How to Select a Curing Light for Your Dental Practice
A curing light can look like a small purchase next to an operatory package, digital X-ray system, or sterilizer. But when it underperforms, the cost shows up chairside: incomplete polymerization, sensitivity concerns, premature restorations, retakes, and appointments that run longer than they should. Knowing how to select curing light equipment means looking beyond a big irradiance number on a product sheet and buying for the composites, workflow, and operators in your practice.
For most private practices, the right choice is a dependable LED unit with adequate output, a useful wavelength range, consistent beam coverage, and serviceable batteries or power options. The most expensive light is not automatically the best fit. The bargain unit is not a bargain if it delivers uneven curing or becomes difficult to support six months later.
How to Select a Curing Light by Clinical Need
Start with the restorative materials you use every week. Most light-cured composites are activated by camphorquinone, which responds primarily in the blue range around 450 to 470 nm. A single-peak LED light designed around that range may be perfectly appropriate for a practice using conventional composites, bonding agents, and sealants with camphorquinone-based initiators.
The decision changes if you regularly use materials containing alternative photoinitiators. Some esthetic composites and specialty materials use initiators that require violet light closer to 405 nm. In that case, a broad-spectrum or multi-peak LED curing light is the safer purchase because it covers both violet and blue wavelengths. Do not assume every LED light cures every material equally well. Check the instructions for use for the materials your team uses most often, then match the light's wavelength output to those requirements.
This is a practical place to avoid paying for features you will never use. If your materials are consistently compatible with a single-peak light, a well-built single-peak unit can provide excellent value. If your doctors use a broad mix of modern restorative materials, multi-peak flexibility may prevent unnecessary limitations at the chair.
Focus on radiant exposure, not just irradiance
Irradiance, usually stated in mW/cm², tells you how much light energy reaches a given area at a given moment. It matters, but it is only one part of the curing equation. The more clinically useful concept is radiant exposure: irradiance multiplied by curing time.
A light rated at 1,000 mW/cm² for 20 seconds delivers a different energy dose than a light rated at 2,000 mW/cm² for five seconds. High-output modes can reduce chair time, but they also demand disciplined technique. If the tip is not held close, centered, and steady, a short cycle may not deliver the energy the restoration needs.
Be skeptical of impressive output claims without context. Output can vary across the face of the tip, decline with distance, and be affected by a scratched or contaminated light guide. A reliable manufacturer should provide clear specifications, sensible recommended curing times, and documentation that supports its claims. Fast curing is valuable, but predictable curing is what protects the procedure.
Check Beam Coverage Before You Buy
The tip diameter and beam profile determine whether energy reaches the entire restoration evenly. A narrow tip may work well for small anterior restorations or sealants but can require multiple exposures for wider posterior composites. That adds time and introduces the possibility of missed areas.
For general dentistry, a tip with broad, uniform coverage is usually the better daily-workhorse choice. Look for a light that produces consistent energy across the usable area of the tip, rather than a concentrated hot spot in the center with weaker output at the edges. A wide tip is particularly useful when curing larger Class II restorations, though access in posterior areas still matters.
Distance is equally important. Every millimeter between the light guide and composite can reduce delivered energy, especially with narrow or deeply contoured preparations. Choose a design with a slim head and a tip shape that lets clinicians position the guide close to the restoration without blocking visibility. A rotating or angled tip can be helpful when access is difficult, but only if it remains stable and easy to disinfect.
Match Curing Modes to Your Team's Workflow
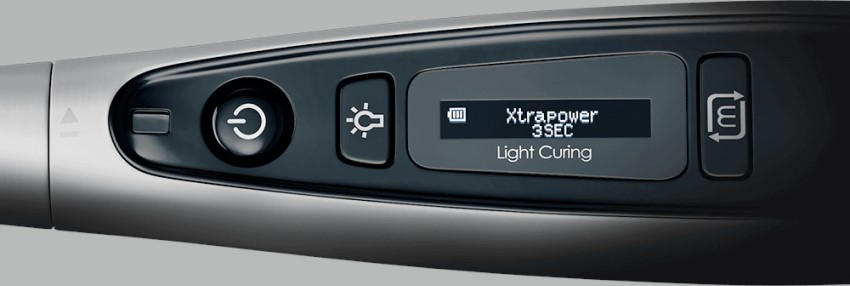
Most modern LED curing lights offer several modes, such as standard, high-power, soft-start, ramp, pulse, or ortho modes. More modes do not automatically mean more value. The real question is whether your doctors and assistants will use them correctly.
Standard mode is the baseline for most restorative procedures. High-power or turbo modes can shorten curing cycles, which is attractive in a busy schedule, but they may generate more heat and leave less room for positioning error. They should be used only within the material manufacturer's recommended exposure parameters.
Soft-start or ramp modes gradually increase output. Some clinicians prefer them when managing polymerization stress in certain composite procedures. Their practical benefit depends on the material, increment size, preparation design, and the clinician's technique. They are not a substitute for proper layering, appropriate exposure time, or a light positioned close to the composite.
For a startup office, a simple light with clearly labeled modes may be more efficient than a complicated device with settings nobody uses. For a multi-doctor practice with extensive restorative and orthodontic workflows, extra programming and high-output options may earn their place. Buy for your real appointment mix, not for a feature list designed to impress at a trade show.
Do Not Ignore Heat, Ergonomics, and Infection Control
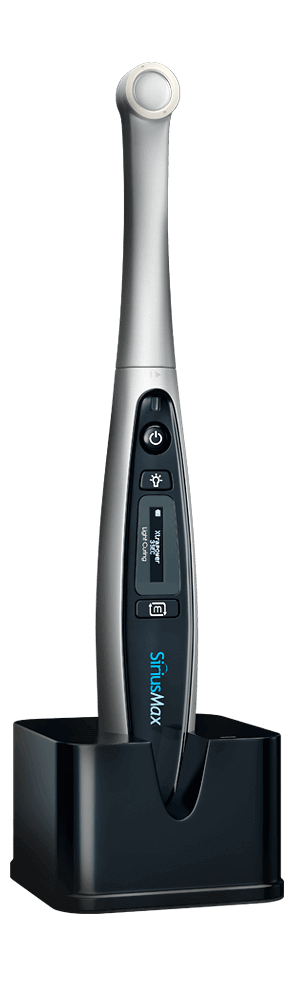
A curing light spends all day in a clinician's hand. Weight, balance, button placement, and head size affect fatigue and positioning accuracy. A lightweight cordless unit can be easier to maneuver, especially during long restorative days. However, cordless convenience means battery management becomes part of the workflow.
Ask how many full curing cycles the battery supports, how long it takes to recharge, and whether a replacement battery is available. A charging base is convenient, but a practice should also consider what happens when the battery ages or a light is dropped. For offices with multiple operatories, having a second light or readily available replacement battery can prevent an avoidable schedule disruption.
Heat deserves the same attention. High-intensity lights can warm the tooth or soft tissue if used too long or too close. A unit should have a design that manages heat appropriately, but the operator still needs to follow recommended exposure times and use correct technique. Faster is not always better when patient comfort and pulpal health are part of the equation.
For infection control, look for smooth surfaces with minimal crevices, autoclavable light guides where applicable, and protective barrier sleeves that fit without interfering with the tip or output. The light must be easy to clean between patients. If the design makes proper reprocessing inconvenient, staff will lose time or take shortcuts neither the practice nor the patient needs.
Verify Performance and Support After Delivery
A curing light should be checked routinely, not simply trusted because it powers on. Resin buildup, damaged tips, aging LEDs, and battery issues can reduce performance. Establish a simple office protocol: inspect the guide, clean it according to the manufacturer's instructions, confirm the unit is functioning, and periodically verify output with an appropriate light meter or test method.
Remember that meters can differ in accuracy and may not read every wavelength equally. Their value is consistency. If your baseline readings change significantly, investigate before a restoration fails. Training matters, too. Every clinician should understand how tip distance, angle, exposure time, material shade, opacity, and increment thickness affect cure quality.
Service is part of the purchase price, even when it does not appear on the invoice. Before buying, confirm the warranty, repair process, availability of light guides and batteries, and whether technical help is accessible when your office needs it. The lowest upfront price only creates real savings when the equipment remains usable and supported.
Buy the Best Value, Not the Loudest Spec Sheet
A smart curing-light purchase starts with material compatibility, then weighs output, beam uniformity, tip access, battery reliability, and support. For many practices, two dependable curing lights are a better operational decision than one premium unit with no backup. Downtime is expensive, and an extra unit keeps restorative procedures moving when a battery, tip, or charger needs attention.
Lion's Dental Supply & Equipment helps practices compare quality name-brand equipment without the inflated pricing common with major distributors. Ask for the specifications that matter, compare like for like, and insist on clear answers about warranty and support. Your curing light is a small device with a direct effect on every restoration it touches - buy one that earns its place in the operatory every day.