 |
Lion's Dental Supply & Equipment
|
|
|
|
|
 |
|
|
|
|
Dental Equipment News Blog
|
Dental Startup Equipment Buying Guide for New Offices |
A new practice can lose tens of thousands of dollars before its first patient sits down - not because the dentist chose poor equipment, but because the purchase order was built in the wrong sequence. This dental startup equipment buying guide is designed to help private practice owners buy what their office truly needs, protect cash flow, and avoid paying big-distributor pricing for the same quality equipment.
The goal is not to buy the cheapest item in every category. It is to buy dependable, serviceable equipment that matches your procedures, your floor plan, and your first-year patient volume. Spend where downtime would hurt your practice. Save where a premium feature will not create a better clinical or patient experience.
Start With Your Clinical Model, Not a Catalog
Before comparing chairs, sensors, or sterilizers, define the practice you are actually opening. A two-operatory general practice has a very different equipment list than a three-operatory office built around implants, endodontics, or pediatric care. Your equipment plan should follow the procedures you expect to perform in the first 12 to 24 months, not every procedure you may someday add.
Start with the number of operatories you will open on day one, then decide how many need to be fully equipped immediately. Many startups build plumbing and electrical capacity for future rooms but initially furnish only the rooms needed to keep overhead in check. That is usually the smarter move. An empty operatory plumbed for expansion costs far less than a fully outfitted room collecting dust.
Also account for the clinical workflow behind the scenes. Where will instruments be cleaned, bagged, sterilized, cooled, and stored? Where will imaging hardware sit? Is there adequate room for compressor and vacuum equipment, heat management, and service access? Equipment that looks like a bargain can become expensive quickly if installation requires unplanned construction changes.
Buy Your Startup Equipment in the Right Order
A disciplined buying order keeps essential systems from getting crowded out by attractive but nonessential upgrades. Focus first on infrastructure and patient-ready operatories, then on compliance-critical systems, then on diagnostic and procedure-specific equipment.
Build the operatory around reliability
The dental chair, delivery system, operating light, doctor and assistant stools, cabinetry, and evacuation connections are the center of your daily production. These are not purchases to make on appearance alone. Consider patient positioning, clinician ergonomics, left- or right-handed configuration, delivery style, utility requirements, upholstery durability, and local service availability.
A complete operatory package can offer better value than piecing together individual components, especially when you need matching equipment across multiple rooms. Still, compare what is included. Some packages exclude stools, monitors, handpieces, installation components, or accessories that appear minor until they add several thousand dollars to the final invoice.
For a startup, proven name-brand operatory equipment often makes more business sense than chasing an overbuilt configuration. The best chair is the one that runs reliably, fits the room, supports your workflow, and can be serviced without drama during a full schedule.
Do not underbuy sterilization capacity
Sterilization is where a startup should plan for growth rather than bare-minimum volume. Your autoclave or sterilizer must keep pace with instrument turnover, but capacity is only part of the decision. Consider cycle time, chamber size, water requirements, drying performance, monitoring, maintenance needs, and the space required for a compliant instrument-processing flow.
A single undersized sterilizer may be less expensive upfront, but it can create bottlenecks on busy days and leave the practice vulnerable if it needs service. Depending on your schedule and procedure mix, two appropriately sized units may provide better operational security than one larger machine. Add ultrasonic cleaning equipment, instrument washers where appropriate, pouches, indicators, distilled water planning, and storage to your budget from the beginning.
Size compressor and vacuum systems for real demand
Your air compressor and vacuum pump are easy to overlook because patients never see them. Your office will notice immediately if they are undersized, noisy, poorly located, or unavailable. Size these systems based on the number of simultaneous operatories, expected usage, equipment requirements, and expansion plans.
Oil-free dental compressors are commonly preferred for clean, dry air, but capacity and duty cycle matter more than a label. For vacuum systems, evaluate suction performance, wet versus dry requirements, noise, utility consumption, maintenance, and local regulations. A lower-priced system that cannot support two clinicians working at once is not a bargain.
Choose Imaging for Your Workflow and Budget
Digital imaging is a core investment, but startups do not need to buy every imaging technology on opening day. Most general practices need a practical plan for intraoral radiographs, whether that means digital X-ray sensors, a PSP scanner, or a combination of both.
Sensors provide immediate images and fast chairside workflow, but they require careful handling and can be costly to replace. PSP systems are flexible, useful for multiple rooms, and often easier to scale, although they add scanning steps and plate management. The right answer depends on room count, staff workflow, software compatibility, and how much redundancy you want.
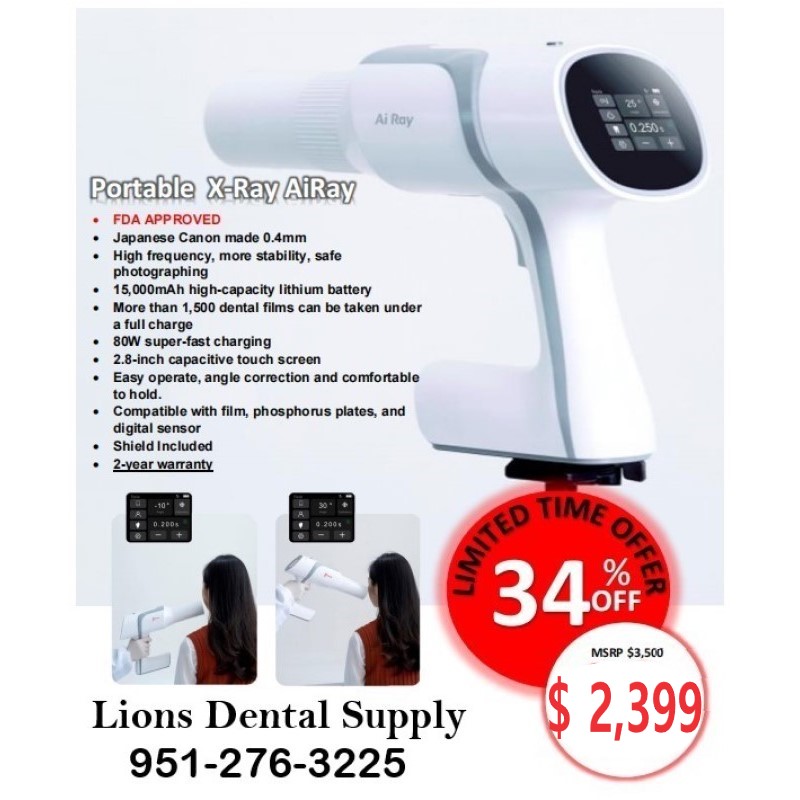
Handheld X-ray units can provide flexibility, while wall-mounted units may better suit a fixed operatory layout. Either way, confirm compatibility with your imaging software and plan for required shielding, state regulations, and installation. An intraoral camera is also a strong early purchase because it helps patients see what you see, supports case acceptance, and documents clinical findings without a major capital outlay.
CBCT, panoramic imaging, and advanced digital systems can be excellent investments for implant-focused, surgical, or high-volume practices. But they should be supported by a real production plan. If referrals, case volume, and space do not justify the purchase yet, leasing time or referring out can protect your startup capital.
Spend Strategically on Procedure-Specific Devices
Once essential systems are covered, match specialty equipment to the procedures that will produce revenue. A general practice may prioritize ultrasonic scalers, curing lights, electrosurgery units, and reliable handpiece support. A practice planning to place implants may need an implant motor and related surgical equipment. Endodontic, periodontal, pediatric, and oral surgery offices will have their own must-have categories.
Avoid buying advanced technology simply because it is new or heavily promoted. Ask a tougher question: Will this device improve patient care, efficiency, diagnosis, or production enough to justify its purchase, maintenance, training, and consumable costs? If the answer is uncertain, delay it until the practice has dependable patient volume.
That does not mean settling for inferior tools. It means buying proven equipment from recognized manufacturers at a price that leaves room for payroll, marketing, supplies, and working capital. Your startup needs margin more than it needs a showroom full of features.
Compare Total Cost, Not the Sticker Price
A low equipment quote can hide freight, installation, accessories, software fees, extended warranties, training, utility upgrades, and service costs. On the other hand, a high quote from a national distributor is not automatically safer. Brand name, warranty coverage, and support matter, but so does the price you pay for them.
When comparing quotes, make sure every vendor is quoting the same configuration. Confirm model numbers, included accessories, delivery terms, warranty length, lead times, installation responsibilities, and return policies. Ask whether equipment is new, refurbished, discontinued, or manufacturer-authorized. Small differences in a quote can become large differences in the final project cost.
Price matching and competitive sourcing are especially valuable on capital equipment. A family-owned supplier such as Lion's Dental Supply & Equipment can help practices compare options without the inflated pricing and one-size-fits-all bundles common with larger distributors. You should expect clear answers, recognized brands, and a quote that respects the financial reality of opening a private practice.
Protect Your Investment Before You Order
Finalize your equipment schedule with your contractor, equipment installer, IT provider, and practice-management software team before placing major orders. Confirm electrical loads, plumbing locations, compressed-air and vacuum connections, network drops, monitor mounting, and room dimensions. This coordination prevents the painful surprise of discovering that a chair, sterilizer, or imaging system will not fit the plan as drawn.
Keep copies of warranties, serial numbers, manuals, installation records, and service contacts in one organized location. Train the team on daily care before opening day, because simple maintenance habits can prevent expensive interruptions. And leave room in your budget for backup essentials, replacement parts, and the clinical supplies required to put your equipment to work.
Your first equipment order should give your practice the power to treat patients confidently, not burden it with unnecessary debt. Buy dependable essentials first, negotiate hard, and choose suppliers that treat your startup dollars like their own. |
Best Autoclaves for Dental Offices in 2026 |
A sterilizer that cannot keep up with your schedule is not a bargain. It creates instrument bottlenecks, delayed room turnover, frustrated staff, and unnecessary pressure at the end of every clinical day. The best autoclaves for dental offices deliver dependable steam sterilization, practical chamber capacity, effective drying, and cycle times that match the way your practice actually runs.
For a startup, the right unit may be a compact tabletop autoclave with a disciplined instrument workflow. For a busy multi-provider practice, buying too small can mean running cycle after cycle and still falling behind. The smart purchase is not simply the lowest-priced sterilizer or the largest machine on the market. It is the unit that protects compliance, supports your patient volume, and gives your team room to work efficiently without paying big-distributor pricing.
What Makes an Autoclave Right for a Dental Practice?
Dental offices generally need a steam sterilizer designed for wrapped and unwrapped instruments, with validated cycles, reliable drying performance, and straightforward monitoring documentation. Gravity displacement autoclaves use steam to push air out of the chamber. Pre-vacuum units actively remove air before steam enters, which can improve penetration and drying for wrapped loads and more complex instrument configurations.
Neither option is automatically right for every office. A gravity unit can be a strong value for a lower-volume practice with conventional loads and a well-organized sterilization area. A pre-vacuum sterilizer usually makes more sense when volume is high, wrapped cassettes are common, or rapid instrument turnaround matters throughout the day.
Before comparing brands, start with your real workflow. Count how many instrument setups you process on a normal day, not a slow Friday. Consider how often hygienists, assistants, and doctors need the same instrument types. Then account for growth. An autoclave should solve today's workload without becoming the next equipment bottleneck a year from now.
Best Autoclaves for Dental Offices by Practice Need
The strongest buying decision comes from matching equipment class to demand. These are the common categories private practices should evaluate.
Compact tabletop autoclaves for startups and single-doctor offices
A compact tabletop sterilizer is often the sensible entry point for a new office, satellite location, or practice with moderate daily instrument volume. Smaller chamber units cost less upfront, use less counter space, and can be easy for staff to operate. Models such as the Midmark M9 and comparable compact Tuttnauer units are widely recognized options in this category.
The trade-off is capacity. Small loads may work well when the office has enough instrument sets and staff can maintain a consistent sterilization flow. They become costly in time when an office is forced to run repeated cycles just to cover a busy hygiene schedule. Do not confuse a low purchase price with a low operating cost if your team will spend all day waiting on a small chamber.
Large-chamber tabletop autoclaves for busy general practices
For most growing general practices, a larger tabletop autoclave is the sweet spot. Units in the class of the Midmark M11 or larger Tuttnauer automatic models give teams more chamber space for pouches, cassettes, and larger instrument loads. That extra capacity can reduce cycle congestion and help prevent the sterilization area from dictating the pace of the entire office.
This category is especially attractive for offices with multiple hygienists, several operatories, or a heavy restorative schedule. A larger chamber also gives the practice more flexibility when same-day procedures add unexpected instrument demand. The upfront difference can be justified quickly when it eliminates the need for constant catch-up cycles.
Pre-vacuum sterilizers for high-throughput workflows
High-volume offices and specialty practices should look closely at pre-vacuum autoclaves. By removing air before the steam phase, these units are built for effective processing of wrapped loads and can offer more efficient drying performance. That matters when instruments must be packaged, sterilized, stored, and ready to return to service without moisture-related delays.
Pre-vacuum technology can carry a higher initial cost, and the office must follow the manufacturer’s maintenance requirements carefully. Still, for practices processing substantial wrapped loads, the investment can be far less expensive than lost productivity, rushed workflows, or adding another undersized unit later.
Cassette sterilizers for fast chairside turnaround
Cassette-based sterilizers, including well-known STATIM systems, serve a different purpose than traditional chamber autoclaves. Their speed and cassette workflow can be extremely useful in offices that need frequent, rapid turnaround of small instrument sets. They can fit well in endodontic, surgical, and high-efficiency general practice settings.
Their limitation is load format and capacity. A cassette sterilizer may be an excellent second sterilizer or a targeted workflow tool, but it is not always the best stand-alone answer for an office processing large mixed loads all day. Evaluate the cassettes your practice uses, the instruments they accommodate, and the number of cycles required before making cassette technology your primary sterilization solution.
Capacity, Cycle Time, and Drying: The Numbers That Matter
Autoclave specifications can look similar on a product sheet, but three factors determine whether a machine helps or hinders your staff: usable capacity, total cycle time, and drying quality.
Chamber size is more meaningful than a simple “large” or “small” label. Look at the diameter and depth, then think through your actual pouches, trays, and cassette loads. An autoclave with a larger chamber that is difficult to load efficiently may not provide the advantage you expect. Conversely, a properly sized unit can process more setups per cycle and reduce the number of times staff touch instruments throughout the day.
Cycle time should be measured from start to ready-to-use, not merely the sterilization exposure phase. A fast sterilization cycle loses value if drying is inadequate and packaged instruments must sit before they can be stored. Wet packs are not a minor inconvenience. They can compromise packaging integrity and force staff to reprocess items, wasting time and supplies.
Drying performance deserves special attention if your practice regularly processes wrapped instruments. Ask how the unit handles different load types, what cycle options are available, and whether staff can consistently follow loading instructions. Overloading any autoclave is a common reason even a quality unit performs poorly.
Compliance Features Worth Paying For
The right sterilizer supports a repeatable process, but the machine alone does not create compliance. Your office still needs trained staff, proper packaging, chemical indicators, biological monitoring, maintenance records, and written procedures that align with applicable CDC guidance, state requirements, and manufacturer instructions.
When comparing units, prioritize controls that make the process easier to manage. Useful features include programmable cycle selections, clear error notifications, temperature and pressure monitoring, print or digital cycle records, and water-quality alerts where available. Automatic controls reduce guesswork, which is valuable when several team members rotate through the sterilization area.
A reliable documentation option can save time during internal reviews or inspections. It also gives the practice a better way to identify trends before they become failures. If a sterilizer repeatedly produces wet packs, errors, or inconsistent records, that is a workflow problem worth addressing immediately, not after a failed monitoring result.
Do Not Buy on Price Alone - Buy on Total Value
There is a real difference between controlling equipment costs and buying the cheapest box available. A low-cost, poorly supported autoclave can become expensive through downtime, replacement parts, staff frustration, and lost clinical production. On the other hand, paying a premium simply because a national distributor has a familiar catalog is not a strategy either.
Focus on total ownership value: purchase price, warranty, service availability, expected maintenance, required accessories, chamber capacity, and the cost of downtime. Name-brand equipment with accessible support and parts often delivers the best long-term value, especially when purchased at an aggressively competitive price.
A second unit is also worth considering for offices that cannot afford sterilization downtime. It does not always need to be identical to the primary unit. A compact backup autoclave can keep essential instruments moving during maintenance, repairs, or unusually heavy days. For a multi-provider office, redundancy is often operational insurance, not an unnecessary luxury.
Questions to Ask Before You Place the Order
Confirm the electrical requirements, counter space, clearance needs, water requirements, drainage expectations, and installation instructions before choosing a model. A sterilizer that fits on paper but does not fit the sterilization center creates an expensive problem. Also verify what is included: trays, racks, printer options, monitoring accessories, and any required starter materials can affect the real delivered cost.
Ask the practical questions your staff will ask later. How easy is it to load? How long does a typical wrapped cycle take from beginning through drying? What maintenance is required daily, weekly, and monthly? Who handles warranty service? How quickly can replacement parts be sourced if needed?
Lion's Dental Supply & Equipment helps private practices compare recognized sterilizer brands and configurations without the inflated pricing and impersonal treatment common from large distributors. The right conversation should center on your rooms, provider count, instrument volume, and budget - not on pushing the most expensive model in the catalog.
A dependable autoclave gives your clinical team confidence every time a pouch is opened and every time a room turns over. Choose capacity for the practice you are building, demand reliable support, and make sure the price leaves more of your hard-earned revenue inside your practice. |
How Price Match Dental Equipment Suppliers Work |
A $2,000 difference on an autoclave or a $5,000 gap on an operatory package is not a minor purchasing detail. It can determine whether a practice upgrades now, delays needed equipment, or settles for less. Price match dental equipment suppliers give private practices a stronger way to buy: bring a legitimate competing quote forward and demand a better deal without sacrificing the brands, warranty coverage, or support your office needs.
For startup dentists, that buying power can stretch a build-out budget across more critical categories. For established offices, it can make replacing a failing compressor, upgrading imaging, or adding a second sterilizer far more practical. The key is knowing what a real price match includes, what to compare, and when the lowest sticker price is not actually the lowest cost.
What Price Matching Should Mean for Dental Equipment
A real price match is more than a salesperson saying they can “see what they can do.” It starts with an equivalent product, a verifiable competitor price, and a clear final number. If you are comparing a digital X-ray sensor, for example, the model, size, included software, warranty terms, and accessories should all match. A lower quote for a different configuration is not an apples-to-apples comparison.
The strongest suppliers use price matching to compete for your complete purchase, not to hide costs in the fine print. That means discussing the delivered price, freight, installation requirements, lead time, and any items needed to make the equipment operational. An operatory chair price may look attractive until you learn the quote excludes a delivery unit, light, assistant instrumentation, plumbing components, or white-glove delivery.
Dental practices should expect direct answers. What is included? Is the product new and manufacturer-authorized? Is the warranty valid in the United States? When will it ship? Who handles a problem after the sale? Those questions protect your investment while keeping the pricing conversation honest.
Why Private Practices Should Ask for a Price Match
Large distributors have long benefited from busy offices that reorder from the same account out of habit. That convenience has a cost. Pricing can vary dramatically between customers, regions, contract levels, and promotions, even when buyers are purchasing the exact same equipment.
Private practices do not need to accept that model. A competitive quote gives you leverage, particularly on capital purchases such as chairs, treatment units, sterilizers, digital imaging systems, implant motors, air compressors, vacuum pumps, and electrosurgery units. These are not disposable purchases. Every unnecessary dollar spent is money that cannot go toward staffing, marketing, supplies, technology, or patient experience.
Price matching also saves time when it is handled by a knowledgeable dental equipment team. Instead of collecting five incomplete quotes and trying to decode each one, you can provide a legitimate offer and ask for a straight comparison. The right supplier should help identify missing components, compatibility concerns, or misleading exclusions before they become expensive surprises.
A lower price should not mean a weaker purchase
The goal is not simply to buy the cheapest equipment available. The goal is to buy reliable, name-brand equipment at an aggressively competitive price. A bargain-priced unit from an unauthorized source can create warranty trouble, unavailable parts, unsupported software, or service delays that cost more than the original savings.
That trade-off matters most for equipment your practice cannot operate without. If an autoclave, compressor, vacuum, sensor, or chair goes down, the impact reaches far beyond the repair bill. Production schedules, patient care, and staff confidence all take a hit. Price matching should help you avoid overpaying, not push you toward questionable equipment or incomplete support.
How to Compare Quotes Before You Buy
Start by requesting a written quote that identifies the manufacturer, exact model number, configuration, and included accessories. Screenshots can be useful, but a detailed quote is better. It gives the supplier a fair opportunity to match or beat the offer and gives your practice a clean record of what was promised.
Then compare the total delivered cost. Freight is especially important with heavy equipment such as chairs, delivery systems, compressors, vacuums, sterilizers, and cabinetry. A lower product price can disappear after freight charges, liftgate fees, residential or limited-access delivery charges, and installation-related expenses are added.
Warranty terms deserve the same attention. Confirm whether the product carries the full manufacturer warranty and whether labor, travel, or technical support are covered if service is needed. Some equipment categories require professional installation or local service coordination. A lower upfront price may still be worthwhile, but your practice should know exactly where responsibility begins and ends.
Finally, check availability. A deeply discounted unit that is backordered for months may not solve an urgent equipment failure. If your existing sterilizer is unreliable or your imaging system has stopped functioning, speed has real value. The best deal is the one that meets your budget and keeps the practice moving.
Where Price Match Dental Equipment Suppliers Create the Most Value
Price matching can matter across an entire dental office, but it is especially valuable in categories where list prices are high and configurations are easy to confuse.
For operatories, compare the chair, doctor’s delivery system, assistant package, LED light, stools, monitor mounts, and any required utility components. A quote that appears thousands lower may leave out pieces that another quote includes. For a new office, asking for a package comparison can reveal whether you are paying for unnecessary upgrades or missing essentials.
For sterilization, look at chamber capacity, cycle options, printer or data logging features, water systems, cassette compatibility, and required accessories. An autoclave purchase is tied directly to workflow and compliance, so the right unit depends on procedure volume and turnaround needs. A small practice with modest daily volume may not need the same configuration as a multi-provider office.
For imaging, compare sensor size, software compatibility, warranty length, calibration support, and whether the quote includes necessary licenses or accessories. Digital sensors and PSP scanners can be excellent investments, but the lowest quote is only useful if the system works with your current computers and practice workflow.
For mechanical-room equipment, capacity and fit matter as much as price. An air compressor or vacuum pump must be sized for the number of operatories, expected usage, electrical service, plumbing layout, and expansion plans. Buying too small may save money at checkout and create a daily bottleneck afterward.
Questions That Expose a Weak Equipment Quote
Before asking a supplier to match a price, make sure you can answer a few practical questions. Is the quote for brand-new equipment? Does it include every component required for normal use? Is shipping included or calculated later? Is the item in stock? Is the manufacturer warranty intact? Will the supplier help if there is a technical issue after delivery?
Also ask whether the competitor’s price depends on a membership, volume contract, financing condition, trade-in, or limited-time promotion. Those details do not automatically make the quote invalid, but they should be disclosed. A good supplier will tell you when a match is realistic and when the competing offer is structured differently.
Be wary of vague product descriptions such as “comparable chair” or “digital sensor package” without a model number. Dental equipment is too expensive and too critical to purchase on broad descriptions. Precision protects both your price and your practice.
Use Your Purchasing Power Across the Office
A single equipment purchase is a chance to negotiate. A planned project is an even stronger opportunity. If you are buying a chair, sterilizer, curing lights, ultrasonic scalers, intraoral cameras, and supply items at the same time, ask for package pricing. Suppliers can often be more aggressive when they understand the full scope of the order.
This does not mean every item must come from one source. There are times when a specialty product, local service arrangement, or immediate availability makes another option the right choice. But your default should be to compare, ask for the match, and make suppliers earn your business.
Lion’s Dental Supply & Equipment was built around that straightforward principle: private practices deserve quality name-brand dental equipment without the inflated pricing and impersonal treatment that often come with big distributors. A family-owned supplier should work hard for your order, communicate clearly, and help protect the budget you worked hard to build.
The next time an equipment quote lands on your desk, do not treat the number as final. Verify the configuration, compare the total cost, and put that quote to work. A few direct questions can turn a routine purchase into meaningful savings your practice can use where it matters most. |
Cheaper handpiece repairs aren’t always better—they’re actually worse |
When you walk into your practice, you want things to run smoothly—no glitches, unexpected cancellations, staff conflicts, or equipment failures. Unfortunately, these things happen more often than we’d like because, to some extent, many are out of our control. That’s when we modify, adapt, and make the most out of the situation. But maybe we have more control than we think. Curious? Keep reading.
Steve Frost, DDS, who runs a successful endodontic office in Arizona, was looking to purchase new handpieces. He made the investment with KaVo and purchased the lubricating and maintenance accessories per the manufacturer’s recommendations, as it is well documented that daily handpiece maintenance is essential. The demand he put on his handpieces was high. Over time the torque, stress, and strain from cutting through zirconia, metal, and porcelain crowns took its toll.
After about a year and a half of heavy and intense use, as normal wear and tear would have it, the handpieces needed to be sent in for service and replacement parts. The fixes would be simple . . . or so he thought. He sent them out to a local repair provider and didn’t think anything of it when they came back.
However, after about five or six months, much to his dismay, he noticed the turbines grinding in several handpieces, which subsequently led to vibrating and overheating. Not good. He sent them back to the repair provider a second time, and the same thing happened. Only this time, he noticed that the color on the head was different (albeit slightly) than the rest of the handpiece, so he called his KaVo sales representative. Dr. Frost was slightly frustrated as his investment up to this point was costly and getting a little out of hand.
“Counterfeit parts,” the sales rep told him. Those two words summed it up. “Original equipment manufacturer, or OEM, parts comply with the highest standards and are manufactured to meet rigorous quality and regulatory requirements, whereas counterfeit parts may not be,” he explained. Unbeknownst to him, Dr. Frost’s handpiece was repaired with counterfeit parts. As a result, the turbines were more or less shot and the entire handpiece needed a complete overhaul. This was not the kind of news he wanted to hear, especially after he had already spent enough on repairs to have paid for a new handpiece.
If this story sounds familiar, there’s a good reason. I interviewed the repair managers of the top five dental handpiece repair companies that came up from a quick Google search. When asked about their service and parts protocol, four out of the five companies said that, unless the customer stated otherwise, after-market parts are used over OEM parts. Why? Because they’re cheaper.
Your first thought may be, “I don’t want to pay a big bill, and if the parts are just as good, then I don’t have a problem with it.” That’s part of the dilemma. We are made to believe they are just as good, but are they? You know the old saying, “If it’s too good to be true, it probably is”? In the case of handpiece repair, it really is.
Handpieces are one of the most heavily used pieces of equipment in a dental office, yet most practices don’t have contingency plans for repairs. Or if a repaired handpiece breaks, dentists often default to thinking the issue is with the handpiece, instead of the inferior parts used in an earlier repair.
To get better insight into why counterfeit parts are such a problem, I talked with Nichole Hansen who is the manager of the handpiece repair department at KaVo. The first thing she told me is that repairs arrive at her facility daily because they were fixed without OEM parts. It gets even more interesting:
Counterfeit parts can significantly increase the risk of damaging genuine internal parts—yes, the parts may “fit,” but that doesn’t mean they will last or maximize the anticipated lifetime use of the handpiece.
Handpieces that come in with counterfeit parts will typically last less than six months The most common complaints include gear grinding, loud noises, inadequate or inefficient cutting, and overheating.
While cheaper repairs are initially more appealing, dentists might end up spending two to three times more using generic parts than they would if they had repaired it properly with OEM parts in the first place.
This one is worth repeating: OEM parts comply with the highest standards and are manufactured to meet rigorous quality and regulatory requirements. Counterfeit parts may not be.
With counterfeit parts, the likelihood of the handpiece malfunctioning increases, which raises extreme safety concerns for your patients.
Not all after-market parts are considered counterfeit, but KaVo always recommends using only genuine parts to ensure the maximum performance and lifespan of the handpiece.
Both after-market and counterfeit parts could potentially void any manufacturer warranties on the handpiece.
When repaired at an authorized facility by a certified technician, notes, test outcomes, and the technician ID will accompany the return.
We always look for ways to save money and be more efficient with what we do. That’s prudent and good business sense. So let me ask you this: Do you want to spend your money twice when it comes to your equipment?
Let’s put this into perspective. A patient comes in with a broken tooth needing a crown. The patient wants a cheap fix, and you say the best investment is a crown because it returns the tooth to full form and function. A large filling, on the other hand, is a temporary fix, and the patient can ultimately lose the tooth. The key question is this: Is it worth it in the long run to save a few bucks now, in exchange for increasing the risk of losing a tooth? I don’t know about you, but I’d get the crown done. The same goes with our handpieces. Don’t take a risk because it’s cheaper. Insist on getting the best parts for a maximized return on your investment.
Greg Gillespie, DDS, a general dentist in Washington state, has had his own share of negative experiences with faulty parts and nonauthorized repairs. He now insists on only OEM parts and recommends the following:
Use only repair providers who have been authorized by your device’s manufacturer.
Look for a guarantee. Many unauthorized repair providers do not guarantee that their repair will last.
Insist on only OEM parts. For example, KaVo uses OEM parts 100% of the time for all repairs, which allows them to return the handpiece back to its original performance.
Choose a repair provider who offers knowledgeable customer service to provide full support and answer questions about your instrument.
Ask for a report on your handpiece repair. Most authorized repair teams perform tests on handpieces with every repair. They include the test results and detailed notes with each repair, giving you invaluable information for the life of your handpiece.
Mishaps will happen within every practice. While many are out of your control, handpiece repair isn’t. The next time your handpiece starts to grind or overheat, make the wise decision to get it fixed correctly. Although the less expensive alternative may be enticing, you should insist on an authorized repair facility that only uses OEM parts. This will save you time and money as you properly maintain one of the most important tools in your practice. Dentistry is your livelihood, and this is definitely worth the investment.
Originally From dentistryiq.com |
This month Lions Dental Supply focus on billing for soft tissue grafting. This includes dental practices whose dentists are performing the tunneling technique and/or the Chao Pinhole Surgical Technique.
D4270—Pedicle soft tissue graft
Purpose: A pedicle tissue graft is performed to "fix" gum recession. This procedure code can be used to report the tunneling procedure technique or the Chao Pinhole Surgical Technique. It involves augmenting the gingiva to obtain adequate root coverage.
There are many variables involved when it comes to dental insurance coverage and reimbursement for this procedure.
• Dental insurance companies usually cover only if the correct information is reported.
• Submitting the claim with x-rays and periodontal charting is not enough to facilitate coverage and payment.
• A clear written narrative that explains the need for the procedure must be submitted.
• Gingival recession must be noted in the narrative at 5 mm or greater in order for insurance companies to approve coverage.
• Gingival inflammation should be noted in the narrative: mild, moderate, or severe.
• The amount of keratinized/non-keratinized gingiva must be noted in the narrative in order for insurance companies to approve coverage.
• The amount of attached and unattached gingiva must be noted in order for insurance companies to approve coverage.
• Root sensitivity must be noted in the narrative at moderate sensitivity in order for insurance companies to approve coverage.
• If root caries exists, it must be noted in the narrative.
• Mobility must be noted. If mobility exists, the procedure may be denied.
• A 24- to 36-month exclusion applies. This means the same insurance will cover only the procedure in the same teeth reported every 24 to 36 months.
Lions Dental Supply has all the Dental Equipment needed to do any Dental surgery.
From dentistryiq.com |
How to safely and effectively care for dental restorations. |
Dental hygienists routinely deal with prophylaxis of not only teeth, but a vast array of restorative materials. These restorations involve metallic, ceramic, polymeric, and composite materials that are part of the huge armamentarium representing old and new products employed over the past 50 years. More than 1,000 restorative products may be encountered, most of which are not specifically identified in a patient’s record. A dental hygienist needs to be able to recognize various restorative materials and employ the correct treatment protocol. The goals of this review are to summarize the key principles for safe finishing and polishing operations, consider the structure and properties of restorative materials that put them at risk, and identify precautions for dental hygiene procedures.
Metals, ceramics, polymers, and composites are synthetic restorative materials. Metals include amalgam, removable partial denture frameworks, implants, gold, and other casting alloys. Ceramics may be porcelain, porcelain fused-to-metal, porcelain veneers, and high-strength ceramics. Polymers involve infiltrants and polymethyl methacrylate (PMMA) denture base materials. Composites encompass dental composites, glass ionomers, and temporaries. Management of these materials during a dental hygiene appointment requires some understanding of a material’s structure (arrangement, bonding, composition, defects) and properties (physical, chemical, mechanical, biological).1 Clean and smooth surfaces are essential for esthetics, biological health, and long-term resistance to restorative material degradation. This article will focus on identifying unintended effects of cleaning and prevention methods on surfaces.
The microstructure of all restorative materials is based on the chemical phases that exist within a material. A simplified view of microstructures is as a continuous and dispersed phase (Figure 1).2 For example, a dental composite with a dispersed phase of silica filler reinforces a continuous phase, which is based on crosslinked polymer and difunctional monomers. Another example is a dental amalgam with dispersed phases of residual crystalline amalgam alloy particles within a continuous phase of crystalline reaction products.
During a routine prophylaxis (plaque, calculus, and stain removal; surface smoothening) or prevention procedures (topical fluoride applications), a restorative material’s surface may be altered. Softer phases may be inadvertently or selectively removed. The dispersed phase is often chemically different and provides reinforcement properties. It may react differently to finishing and polishing. The best results are achieved by using polishing materials that are softer than both the dispersed and continuous phases of the restorative material.
For a variety of reasons, surfaces also may require gentle smoothening (finishing) by leveling of irregularities after setting, reactions after setting, or intraoral wear. Polishing is intended to remove plaque, stain, or corrosion. These abrasion processes are two-body (ie, surface and abrader) or three-body (ie, surface; lubricant, such as saliva or water; and abrader). The most commonly used, the three-body process is the preferred protocol. Cleaning is desired without substantial surface abrasion. Polishing agents must contain materials that are hard enough to remove plaque or stain, but soft enough to not damage surfaces.
Risks from wear or abrasion are relatively easy to rank in terms of a Mohs Hardness Scale (Table 1).2 Hardness of any material is its mechanical resistance to plastic deformation. Mohs scale comparisons involve two materials being rubbed together to see which one is scratched by the other. This scale spans all material hardness, from the softest (talc = 1) to the hardest (diamond = 10). Hardness is 5–6 for enamel, 3–4 for dentin, and 2–3 for cementum. Polishing agents should be softer than enamel or any of the soft phases in a restorative material.
While the primary consideration in polishing involves the hardness of materials, there are other factors, such as type of wear, duration of wear, applied pressure, and size of polishing particles. Larger particles produce greater wear. Smaller particles may erode softer phases. Dentifrices are designed to accomplish the same result as polishing procedures and are subject to the same conditions. Hardness ratios are typically used to summarize the relative likelihood of a potentially abrasive material to produce surface wear (Figure 2).2
Wear of composites intraorally occurs due to small silica particles (eg, 0.1 µm) within food that abrade the surface by removing softer continuous phases. For restorative composites, this risk is dramatically reduced by high filler particle loading, combining two or three particle sizes for better particle packing, and minimizing average interparticle spaces to less than 0.1 µm.3 Composites wear, but the process is very slow. Longevity for posterior composites equal those of dental amalgams.4,5 Particles in prophylaxis materials must be soft, and have little tendency to abrade the polymer phase.
SPECIAL PRECAUTIONS FOR DENTAL HYGIENE
While most smoothening and polishing procedures are straightforward, there are special precautions worthy to note.
Tooth-colored materials (composites, glass ionomers, temporary, or provisional restorations). Without prior knowledge, it is generally difficult to identify a composite vs a glass ionomer restoration. Both are esthetic and have a continuous polymer phase with a dispersed silicate phase. Dental hygienists should be careful not to apply too much pressure during the polishing stage of the prophylaxis or the continuous polymer phase could slowly become abraded. Surface stains are easy to remove. Marginal stains associated with Class I, II, III, and V restorations, as well as veneers, involve discoloration that cannot be removed without damaging the restorative material. Do not aggressively polish at the margins. A variety of composites (macrofill, midifill, minifill, microfill, nanofill, and bi-hybrid or tri-hybrids, and glass ionomer materials) are available, but the various types are sufficiently similar that the same approach should apply.6
Amalgam. Tarnish or electrochemical corrosion products create a darkened or blackened appearance. Removing corrosion products produces a reflective metallic appearance that may be good for cleanliness but does not increase the material’s longevity. Inadvertent dry polishing of an amalgam and/or excessive pressure generates surface heat that easily melts the Ag2Hg3 reaction product (melting point = 127° C)7 within the continual phase—releasing and smearing Hg on the surface. The amalgam looks shiny because of its Hg-rich surface layer, but that smear layer is quickly lost over the next few days, exposing the patient and clinician to some Hg vapor during or post-procedure.
Always polish amalgams while using water to lubricate and cool the surface. Also, utilize high-volume evacuation to ensure that any mercury-rich materials that form vapor are quickly eliminated and not inhaled by the patient or the dental hygienist.
Amalgam restorations do wear, albeit very slowly. They also expand slowly over time. The net change on occlusal surfaces is that there is no visible change. Yet, in sites protected from intraoral food abrasion, such as interproximal surfaces or facial surfaces, amalgams may slowly begin to stand out from the cavity above the surface of adjacent tooth structure.6 This appearance is not the result of bad dentistry, but simply the lack of natural abrasion. Use water cooling when resurfacing an amalgam restoration. Resurfacing an amalgam restoration may release some Hg vapor, so local high-volume evacuation should be utilized as well as a rubber dam to remove any associated liquid or vapor.
Infiltrated interproximal lesions. Interproximal lesions without cavitation can be infused with special low-viscosity resin that is polymerizable to halt lesion progression and reinforce tooth structure. Beware that radiolucencies on intraoral radiographs may not necessarily signify an advancing carious lesion. These infiltrations stop caries.8 The process should be noted carefully in the patient record during placement. Check for those treatments in the patient’s history.
Titanium implant posts and titanium alloys. These materials are protected by a film of titanium dioxide (called a passivating film) that forms rapidly, clings tightly to the surface. It is so thin that it appears transparent and invisible. Scaling or aggressive polishing procedures remove this protective film. It will immediately reform if the surface is clean. Effective but not overly aggressive instrumentation strokes should be used, along with light polishing pressure and pumice and water. The same protective film may be disturbed by acidic reactions associated with some topical fluorides.
Ceramic: all-ceramic and porcelain-fused-to-metal restorations. Ceramic is relatively resistant to degradation but surfaces can be partly dissolved by highly acidic intraoral solutions.9–11 Treatments with certain topical fluorides will also dissolve small bits of the surface. We have found that coating at-risk surfaces with a petroleum jelly film or other nonwater soluble agent is a simple way to provide temporary protection.
As delivered, ceramic materials should have very smooth external surfaces. Any intraoral adjustments produce surface scratches that require smoothening with diamond finishing pastes (particle sizes approaching 0.1 µm). Ceramics have high hardness and therefore require zirconia or diamond polishing agents for smoothening. Ceramics are very susceptible to crack formation from stressed areas containing surface defects. If these defects are recognized, they should be removed with special small particle diamond polishing pastes. They cannot be removed with normal polishing materials during a dental hygiene procedure.
Dental cements. Permanent restorations are attached with traditional acid-based cements, glass ionomer cements, or resin (composite) cements. The thickness of exposed cement at margins is typically 50 microns to 250 microns. These materials generally have lower hardness than restorative materials or tooth structure. Aggressive polishing may force abrasive material into the margin and potentially erode the cement.12 A technique of light pressure with prophy cup and prophy paste while polishing with swiping strokes across the margins is recommended.
Denture base materials. Most denture base polymer is PMMA with a hardness value similar to that of dentin. These materials are routinely cleaned with commercial denture base products and/or a soft toothbrush with soap and water. Abrasives in polishing materials or dentifrices will produce some surface scratching. Denture base material is commonly crosslinked by adding some difunctional monomer with the original methyl methacrylate monomers, which creates a more water-resistant material. Remember that a PMMA denture is prone to absorb water intraorally, and lose water when it is out of the mouth. Its mechanical properties vary as a function of water content. This is why dentures are stored in water when not being worn. Avoid procedures that would dry out the material.
Gold alloys. Alloys based on gold also corrode, but very slowly. Their surfaces are susceptible to electrochemical corrosion and over time may develop some surface pitting due to the presence of plaque. Therefore, gold restorations should be fully polished during recare visits. Rubber cup polishing with fine prophy paste is recommended. Any surface corrosion products that form are water soluble and, therefore, will not accumulate. Areas that are pitted can be polished, but will continue to slowly corrode if not kept clean.
Bonding systems. Bonding agents are extremely thin (< 5 µm) and only exposed at margins. Bonding agents are not at risk during routine prophylaxis and polishing operations. Do not attempt to remove stain that has crept into open margins of composites or veneers because of the possibility of damaging the margins. This situation is an esthetic failure and requires repair of margins.
CONCLUSION
Dental hygienists play a crucial role in the long-term maintenance of dental restorations. Appropriate care of restorations during dental hygiene procedures depends on recognizing restorative materials, understanding specific precautions, and carefully conducting finishing/polishing procedures. Removal of stain and plaque depends on the hardness of the prophylaxis agent, which should always be less than the hardness of the phases involved in the restorative material or tooth structure. The goal is always to remove plaque, calculus, and/or stain without disturbing the structure of underlying restorative materials.
From Dimensions of Dental Hygiene |
Technique Tips for Handheld Radiography |
Appropriate training and keeping up to date on research are key to ensuring the safe and effective use of a handheld X-ray device.
By Ann M. Bruhn, RDH, BSDH, MS and Kimberly Lintag, RDH, BSDH, MS On Oct 11, 2018
Handheld, portable dental X-ray devices, or handhelds, have gained popularity over the past few years because they enable operators to simultaneously hold the device while exposing radiographic images. In contrast, when using wall-mounted dental X-ray units, the operator must leave the room to make the X-ray exposure, maintaining a safe distance from the source of radiation. Handhelds are ideal for use in situations where wall-mounted dental X-ray devices are not accessible, such as mobile dental clinics and outreach events where midlevel dental hygiene practitioners may provide oral hygiene assessment and treatment.1 In addition, handhelds are useful in emergency situations of mass fatality incidents for disaster victim identification.2
SAFETY
Figure 1. Periapical images require steep increased or
decreased vertical angulation from 0°.
Handhelds are equipped with a backscatter ring shield around the position indicating device (PID) and inherent shielding to keep the operator in the “zone of protection” from resulting backscatter radiation that may be produced during dental X-ray exposures. Current research validates the safety surrounding handheld units cleared by the United States Food and Drug Administration (FDA); no additional radiation risk to the operator has been found when using handheld X-ray equipment when all required safety protocols are followed.3
A 2014 study on handhelds found that devices not cleared by the FDA led to an increased radiation dose to both the patient and operator, as operator shielding and collimation of the primary X-ray beam were not adequate.4 Handheld equipment must have inherent shielding, additional shielding around the PID, and an affixed backscatter ring shield. Handhelds should never be used if the backscatter ring shield is defective, not affixed to the PID, or broken.
Radiographers may also don a lead apron with attached thyroid collar to eliminate any possible scatter radiation exposure from suboptimal positioning of the handheld device and backscatter ring. In addition, some state regulatory boards require operators of handheld radiographic equipment to wear a dosimeter badge to measure the amount of radiation received within a specific preset period, such as weekly or monthly. However, dosimeter badges do not directly protect the operator from ionizing radiation exposure because levels of radiation are found after the badge is assessed. After the dosimeter badge readings are analyzed, the operator may realize that additional protective measures and precautions are necessary.
To further minimize radiation exposure when using handhelds, exposure settings such as milliamperage (mA), exposure time, and kilovoltage (kV) settings should be changed depending on the bone density of the area being imaged, similar to the use of a wall-mounted dental X-ray unit. High density areas within the oral cavity (posterior regions) will require increased exposure settings, while lower density areas will require decreased exposure settings (anterior region).5 Manufacturers of handheld X-ray devices may recommend appropriate exposure settings based on the type of image receptor used (direct digital sensor, phosphor plate, or film); teeth being imaged; location within the oral cavity (maxilla or mandible); and patient size (adult or child). Overall, exposure settings can be set lower for digital sensors and higher for phosphor plates and film, respectively.
Radiographers using handheld radiographic equipment should be knowledgeable on the lowest exposure settings needed to produce an acceptable image and be able to apply safe practices for the operator and patient.
TECHNIQUE
Figure 2. Patients should be instructed to move their head
position upward for mandibular periapical images or
downward for maxillary periapical images.
The operator must follow manufacturer instructions for optimal radiation safety when using handheld X-ray devices. One of the directions for safe use of handhelds is to hold the device at the operator’s mid-torso height for all exposures. However, holding the device at mid-torso height requires a vertical angulation of approximately 0° (with the device parallel to the floor), which is not possible to maintain for all types of dental radiographs. Periapical images require steep increased or decreased vertical angulation from 0°, which would place the operator at risk for radiation exposure to critical organs and out of the “zone of protection” given by the backscatter ring shield of the handheld device (Figure 1).
To follow manufacturer directions and reduce possible operator radiation exposure when using handhelds, the patient should be instructed to move his or her head position upward for mandibular periapical images or downward for maxillary periapical images, instead of keeping the patient’s occlusal plane parallel to the floor and mid-sagittal plane perpendicular to the floor (Figure 2).
The operator must stand directly behind the handheld device during the exposure for optimal protection with the backscatter ring shield, which makes the visualization of accurate angulations necessary to achieve quality images difficult. Also, because the patient’s head will not be in the usual position for exposing radiographs and tilted either higher or lower for operator safety, accurate angulations for effective technique will be more difficult to determine.
The use of image receptor holding devices is beneficial to assist the operator with accurate positioning of the PID; however, the backscatter ring shield interferes with the metal extension arm of the image receptor holding device. Manufacturers of holding devices have shortened the metal positioning arm for use with handheld radiographic equipment; therefore, altered equipment should be used together with handheld devices.
CONCLUSION
With the increased use of handheld X-ray devices, operators need to understand the necessary alterations and safety mechanisms for radiation safety and protection. In order to receive the maximum benefit of handheld devices while minimizing operator scatter radiation, all safety precautions must be followed. Proper technique is vital, as scatter radiation is reduced if the operator is within the backscatter ring shield zone of protection. Operators need to ensure handheld devices are kept at mid-torso height for all exposures to maintain optimal protection with the backscatter ring shield. Training prior to the use of handheld devices and keeping up to date with research and guidelines surrounding handheld radiographic equipment will ensure operator safety and high-quality radiographic images.
from Dimensions of Dental Hygiene |
Video Dental Concepts announces MobileX handheld intraoral x-ray system |
Video Dental Concepts has expanded its portfolio of imaging solutions with the new MobileX handheld intraoral x-ray system, which is designed to offer dental professionals reliability and efficiency.
The MobileX has a unique, lead-infused acrylic shield that protects the operator from scatter radiation, while an internal proprietary housing encases the x-ray tube to block radiation leakage. When the MobileX is used as directed, these shields create a “safe zone” for the operator throughout the x-ray acquisition process.
MobileX produces sharp, clear radiographic images. The system utilizes the latest in x-ray technology—a 0.4 mm focal spot, plus a 70 kV DC x-ray generator that consistently delivers exacting, repeatable exposures.
This handheld x-ray system provides freedom in workflow that is unattainable with wall-mount units. Portable and easy to use, the MobileX can be moved freely between operatories and lets clinicians remain chairside—creating a more positive radiographic experience for all involved. MobileX also provides an immediate cost savings, compared to equipping multiple operatories with wall-mount units.
The MobileX is ready for use right out of the box. Video Dental Concepts does, however, provide free and complete technical service, along with an operating manual and video. Lions Dental Supply & Equipment Will be carrying the MobileX HandHeld Dental X-Ray Unit.
The MobileX features a cutting-edge battery technology, an intuitive user interface, and ergonomic design, making it easier to use and hold. The MobileX battery technology provides consistently reliable, long-lasting battery longevity. Clinicians can easily select the right dose for a patient’s particular need by choosing from a variety of easy-to-understand graphic settings in the redesigned touch pad interface. The MobileX is lightweight and easy to handle.
from DentistryIQ |
|
|
|
 |
 |
|
 |
|